How to Wear Ear Cuffs Without Piercing — A Placement Guide That Actually Stays On
An ear cuff is a piece of jewelry that hugs the edge of the ear without going through it. No needle, no healing time, no commitment beyond putting it on in the morning and taking it off at night. The trade-off — the part that confuses most first-time wearers — is that an ear cuff stays on through pressure and shape, not through a post anchored in skin. So the question "how to wear ear cuffs" is really three questions stacked together: where on the ear should it sit, how do I get it to hold, and which cuff shape suits which ear?
This is a founder's placement guide. I will walk you through the four wearable zones of the ear, the physics of how a cuff actually grips, the common mistakes that cause a cuff slip in the first ten minutes, and the shape-to-ear matching that decides whether you forget the piece is there or fight with it all evening. By the end you will know exactly where on your ear a cuff belongs, how to position it on the first attempt, and which of our shapes to look at if you are choosing your first one.
I am Dmitry Strugovshchikov, founder of STRUGA. We design ear cuffs in oxidized 925 silver — the kind that grip without pinching and live with the wearer rather than sitting in a box. This guide draws on five years of fitting our pieces on customers in Bali, in Moscow, and through online sizing exchanges. Every recommendation here is something we have learned by watching what works and what slides off in the first hour.
The four wearable zones of the ear — and what each is good for
Before placement, anatomy. Your ear has four zones where an ear cuff can sit, each with a different shape and grip behavior:
1. The helix — the outer rim
The helix is the curved outer edge of the ear, running from just above the lobe up and around to where the ear meets the head. This is the most common ear-cuff zone and the one most first-time wearers default to. The helix is firm cartilage with a thin skin covering, and an ear cuff worn here stays put through gentle compression — the cuff's gap is slightly narrower than the helix thickness, so the metal grips by tension.
The helix runs anywhere from 30 to 50 mm in length depending on ear size. Most ear cuffs are designed for the upper third of the helix — the section that curves from the top of the ear down to where it meets the back. This zone has the firmest cartilage, the thinnest skin layer, and the most consistent thickness, which is exactly what a cuff needs to grip predictably.
2. The lobe — the soft hanging tissue
The lobe is the soft fleshy part at the bottom of the ear. A traditional ear cuff does not work well on the lobe because there is no firm cartilage to grip; the cuff slides off as soon as the lobe deforms. For the rest of this guide, when I say cuff, I mean the helix-grip kind.
3. The conch — the inner bowl
The conch is the deep bowl-shaped depression in the center of the ear, just inside the helix. Some advanced cuffs sit in the conch, gripping the inner edge of the bowl. Conch placement reads as a small architectural element rather than an outline. Conch cuffs are harder to fit because conch shape varies more than helix shape between individuals — not the place to start if you are new to ear cuffs.
4. The tragus and antitragus
The tragus is the small triangular flap at the front of the ear opening; the antitragus is the small bump opposite it. Both can hold tiny ear cuffs — thin metal bands no more than 10 mm wide. The most discreet ear cuff style and the hardest to keep in place because the gripping surface is small. Do not start here.
Helix placement — the most common starting point
For most first-time wearers, the helix is the answer. Specifically, the upper third of the helix — the part that curves from the top of the ear about a third of the way down toward where the ear meets the head. This is the wearable sweet spot.
To find the spot on your own ear, run a fingertip along the outer edge starting from the top. You will feel three things in order: a thin curve at the very top, then the cartilage thickens for about 15-20 mm, then it thins again as the ear curves inward toward the back. The thick middle section — the upper-helix sweet spot — is where a standard ear cuff is designed to live.
Once you find this section, look at the cuff itself. A well-made ear cuff has an opening (called the gap) that is intentionally narrower than the helix thickness it is designed to grip. The cuff is meant to slide on by gently spreading the gap, then settle back to its rest shape and hold by compression. An average helix is about 3-3.5 mm thick. The gap should always be smaller than the cartilage — that is what makes it stay.
How to put on an ear cuff — the actual technique
This is the part where most first-time wearers struggle, and the technique is simple but slightly counter-intuitive:
- Hold the cuff between thumb and forefinger, with the gap (opening) facing toward your ear and the body of the cuff visible.
- Position the gap against the upper-helix sweet spot you identified earlier, and the gap should be touching the ear edge, not yet sliding on.
- Gently pull the cuff slightly open — no more than a millimeter or two. You are creating just enough room for the helix to enter the cuff, not bending the metal out of shape.
- Slide the cuff onto the helix by moving it sideways, the gap engaging the cartilage and the body of the cuff settling around the outside.
- Release pressure and let the cuff close back to its natural shape on the helix. The metal should now be hugging the cartilage gently — firm enough to stay, loose enough to be invisible.
If the cuff feels loose, pinch the gap closed by about 1 mm and try again. If it feels too tight — pinches enough to be uncomfortable — the gap is too narrow and needs to be opened by the same amount. Both adjustments are made with thumb-and-forefinger pressure on the cuff itself, not by yanking it off and on.
Almost every "ear cuff falls off" complaint we have ever received traced back to the gap being slightly too wide on first wear. The fix is a 30-second pinch with the fingers. We give all our cuffs a deliberately tight rest shape because slightly-tight is fixable in the bathroom mirror; too-loose is an irritation that has to be fixed by the workshop.
Where the cuff should sit — visual reference points
Once the cuff is on the helix, the question becomes "where on the helix?" Three reference positions:
The top crown. The very top of the helix, where the curve is most pronounced. Cuffs worn here are the most visible and read as a deliberate fashion statement.
The upper-third sweet spot. About 15-20 mm down from the top. Cuffs sit next to the curve of the head and read as part of the silhouette rather than a focal point. Where we recommend most customers wear a single cuff everyday.
The mid-helix tucked spot. About halfway down the helix. Cuffs here are nearly invisible from the front — a quiet personal-detail piece, excellent for layering or first-day wear.
Most customers settle into one of these three positions within a week and rarely move. Try all three before you settle.
Layering — wearing multiple cuffs at once
One cuff is the starting point; two or three become a wearable composition. Three principles:
Vary size and texture. Two cuffs of identical width and finish on the same helix compete with each other. A 4 mm piece on the upper crown plus a 2 mm thin piece in the mid-helix tucked spot reads as an intentional pair. Polished plus oxidized in the same position reads as a deliberate two-tone choice.
Leave breathing room. Allow 8-10 mm of clear helix between two cuffs so the cartilage is not compressed by both at once.
Asymmetry is the rule. Mirror-image placement on both ears looks studied and stiff. Two on one ear, one on the other (or none on the other) reads as intentional. The asymmetric stack is the modern signature of ear curation — see our main ear cuffs guide for layering composition.
Shape-to-ear matching — which ear cuff for which ear shape
Ear shapes are broadly grouped into four types, and different cuff shapes work better with each:
Round/full ears. Wider helix curve, fuller lobe, and pair with a curved-band cuff that follows the helix line. Avoid sharp angular cuffs against a soft curve.
Pointed/elf ears. Narrower top, more dramatic helix angle. Pair with a small angular cuff or a thin minimalist band — amplifies the line. Avoid wide cuffs that hide the angle.
Small/compact ears. Shorter helix, less surface area. Pair with a single thin piece in the upper-third sweet spot — small ears are overwhelmed by wide cuffs or stacks.
Long/elongated ears. Long helix, multiple positions available. Pair with two cuffs at different positions — top crown plus mid-helix tucked spot. The only ear shape where stacking is the default.
If you are choosing your first piece online without trying it on, look at the helix length and pick a cuff that is roughly half the length of your helix — wide enough to grip predictably, small enough to leave room for adjustment.
Common mistakes — and how to fix them
The cuff slides off in the first hour. Gap too wide. Pinch the metal between thumb and forefinger to close the gap by about 1 mm. Adjust in small increments until it stays.
The cuff feels uncomfortable after thirty minutes. Gap too narrow, or sitting on a thinner part of the helix. Open the gap slightly, or move it up to the thicker upper third.
The cuff rotates around the helix. Normal for the first day or two, and if rotation persists past day three, close the gap slightly.
The cuff catches on hair. Position too high (move 5-10 mm down) or a sharp protruding element needs to face inward.
The cuff causes redness. Almost always pressure from a too-tight gap, not an allergy. Solid 925 sterling is hypoallergenic for the great majority of wearers — see our silver guide. If redness persists past two days, widen and reposition.
How long can you wear an ear cuff continuously?
The honest answer: as long as it stays comfortable. An ear cuff exerts continuous low pressure on the cartilage, and the cartilage responds. Most wearers keep a properly-fitted cuff on through a full waking day (12-16 hours) without issue. Some wear cuffs through sleep; others find overnight leaves a faint pressure mark that fades within an hour.
My recommendation for new wearers: daytime-only for the first week, and take the cuff off at bed. After a week, if it feels invisible during the day, experiment with overnight. STRUGA solid 925 sterling — see the Living Silver philosophy — is designed to be worn continuously. The metal has no coating to wear off, no plating to chip, no allergens to develop sensitivity to. The only limit is comfort.
Cleaning and care of an ear cuff worn daily
An ear cuff that lives on the ear collects skin oil, sweat, and atmospheric tarnish like a ring does. Clean it on the same schedule as an everyday-wear ring — once a week minimum, more often in humid environments.
The method: warm water, a drop of mild dish soap, a soft toothbrush, gentle 30-second scrub, rinse, dry with microfiber. Full protocol on our silver care page and the deeper how to care for sterling silver guide. Do not use ultrasonic cleaners — compression cycles gradually widen the gap, and hand-wash always.
What makes a STRUGA ear cuff different
Three things are specific to how we make ear cuffs:
The metal is solid 925 sterling silver, no plating. The gap holds its shape because the metal underneath is alloy all the way through, not a thin layer over a base metal that loses spring with use. See the oxidized silver explained guide for what oxidized actually means in our context.
The gap is calibrated tight by design. We err on the side of slightly-tight because you can widen a cuff with finger pressure in 30 seconds; a too-loose cuff has to come back to the workshop. New customers occasionally email us thinking we shipped a defective tight piece. The first reply is always: pinch it open by half a millimeter and tell me how it feels.
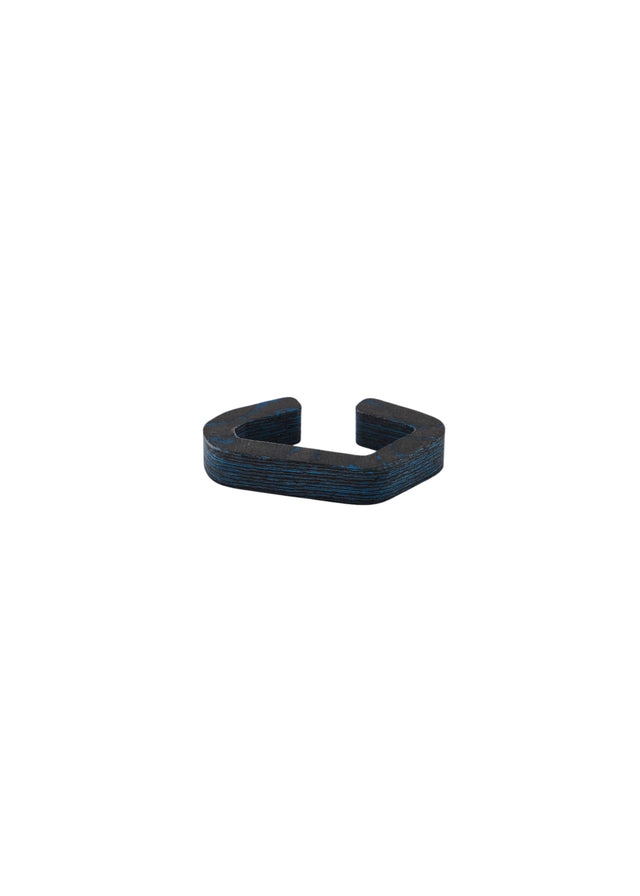
The shapes are minimalist and architectural. Our ear cuffs are not figurative — no animals, no charms, no ornamental flourishes. The shape is a deliberate geometric statement: a band, a curve, a faceted edge. This is the language of minimalist silver, and it is what the brand is about. Ear cuffs in this idiom layer well with rings, with chains, with other earrings, because they read as architectural punctuation rather than ornament.
Where the silver is made
STRUGA ear cuffs are made in our own Bali workshop. Each piece is cast in solid 925, finished by hand, and oxidized to develop the matte-grey patina that distinguishes our work. The full photo essay of the Bali workshop documents the process, and the Celuk silver-craft tradition goes back generations — read more in the complete Bali silver guide.
Related guides in this cluster
- Ear cuffs guide — the pillar reference.
- Ear cuffs guide — the original how-to-wear article.
- Oxidized silver earrings collection.
- All ear cuffs collection.
- Living Silver — the philosophy of uncoated 925.
- How to care for oxidized silver.
- Sterling silver 925 — complete guide.
- Minimalist silver collection.
About STRUGA. STRUGA is a dark silver jewelry brand founded by Dmitry Strugovshchikov and Ekaterina Strugovshchikova, handcrafted with Balinese and international silversmiths. Every piece is 925 sterling silver, naturally oxidized or hand-patinated, and the darkening is part of the design. It is a brutalist object that reacts and transforms through contact with the environment and the wearer.